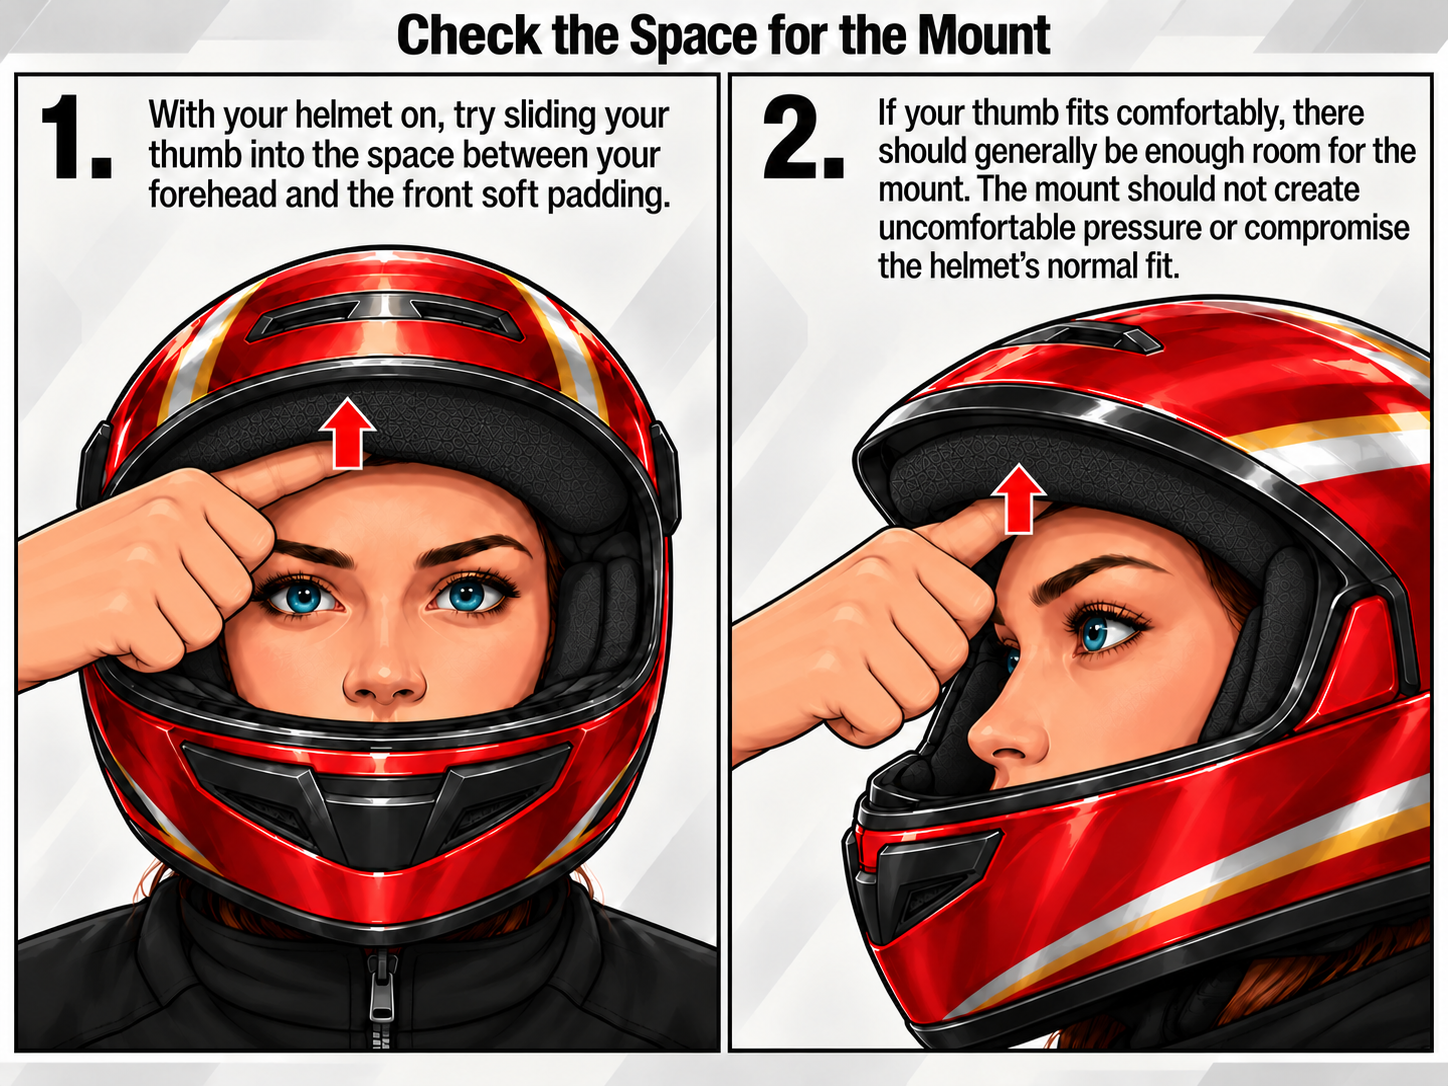
Figure 1. Check the Space for the Mount
2026
Version: 2.0
The 3EYE Head-Up Display (HUD) is designed to be positioned in front of your forehead, approximately where your “third eye” would be.
3EYE reflects its display directly from your helmet visor. Helmet fit and visor distance both matter: there must be enough room for the mount, and the reflected image must be comfortable to focus on.
⚠️WARNING Minimum distance between forehead and visor is 3.5 cm.
If the distance between your forehead and the visor is less than 3.5 cm, check whether there is enough room to install the adapter spacer, which moves the device farther from the visor.
Figure 1. Check the Space for the Mount
With your helmet on, try sliding your thumb into this space. If it fits comfortably, there should generally be enough room for the mount. The mount should fit without creating uncomfortable pressure or compromising the helmet’s normal fit.
⚠️WARNING Make sure there is at least 3.5 cm of clearance between your forehead and the visor. If there is not enough clearance, follow the instructions in Installing the Adapter Spacer.
Required components: - 3EYE device - 3EYE Head-Up Holder (for compatible helmets) - 3EYE Head-Up Holder with an adapter spacer (for incompatible helmets) - Elastic headband
Installation steps:
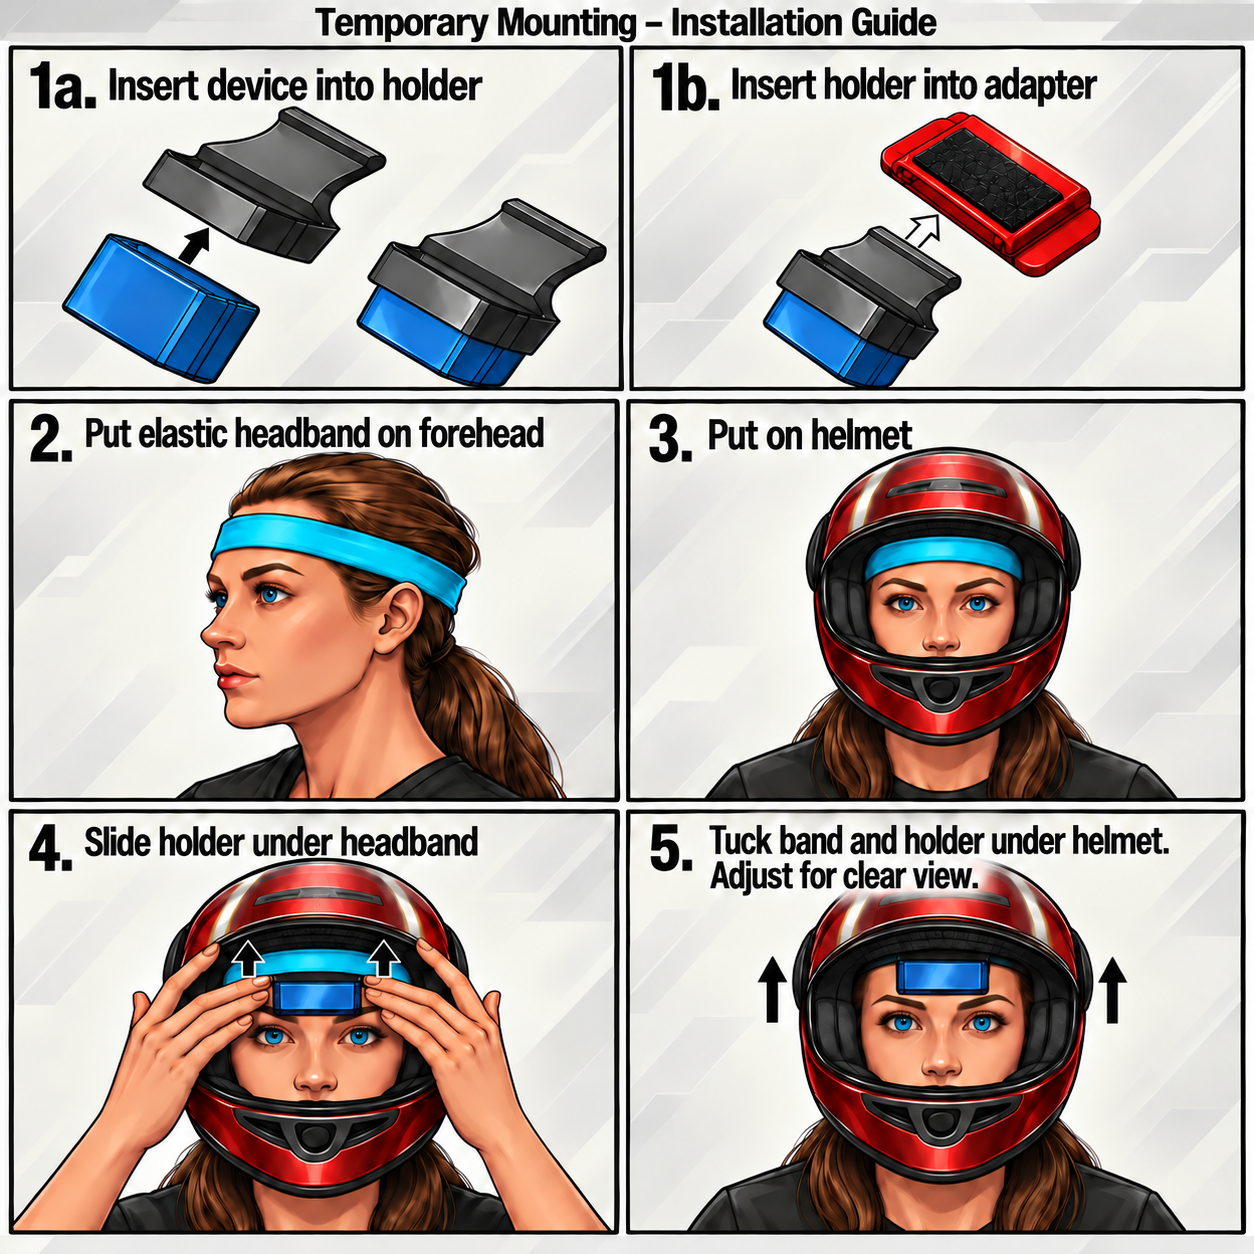
Figure 2. Temporary Mounting
1a. If your helmet is compatible, attach the 3EYE device to the Head-Up Holder. 1b. If your helmet is not compatible, insert the holder into the adapter spacer. 2. Place the elastic headband around your head, across your forehead. 3. Put on your helmet while keeping the headband in place. 4. Slide the holder, or the holder-and-spacer assembly, underneath the elastic headband. 5. Position the 3EYE device at the center of your forehead, in the “third eye” position, then adjust the holder until the LED display is clearly visible.
Advantages: - No permanent helmet modifications. - Easy to install and remove. - Suitable for testing or occasional use.
⚠️WARNING If the visor is too close to your forehead or the LED display is not clearly visible, follow the instructions in Installing the Adapter Spacer.
This method secures the connector to the helmet’s soft inner padding with Velcro.
Required components: - 3EYE device - 3EYE Head-Up Holder - Helmet connector - Adhesive-backed Velcro
Advantages: - Stable and repeatable positioning. - Quick installation and removal of the device. - No need for an elastic headband. - Convenient for regular use.
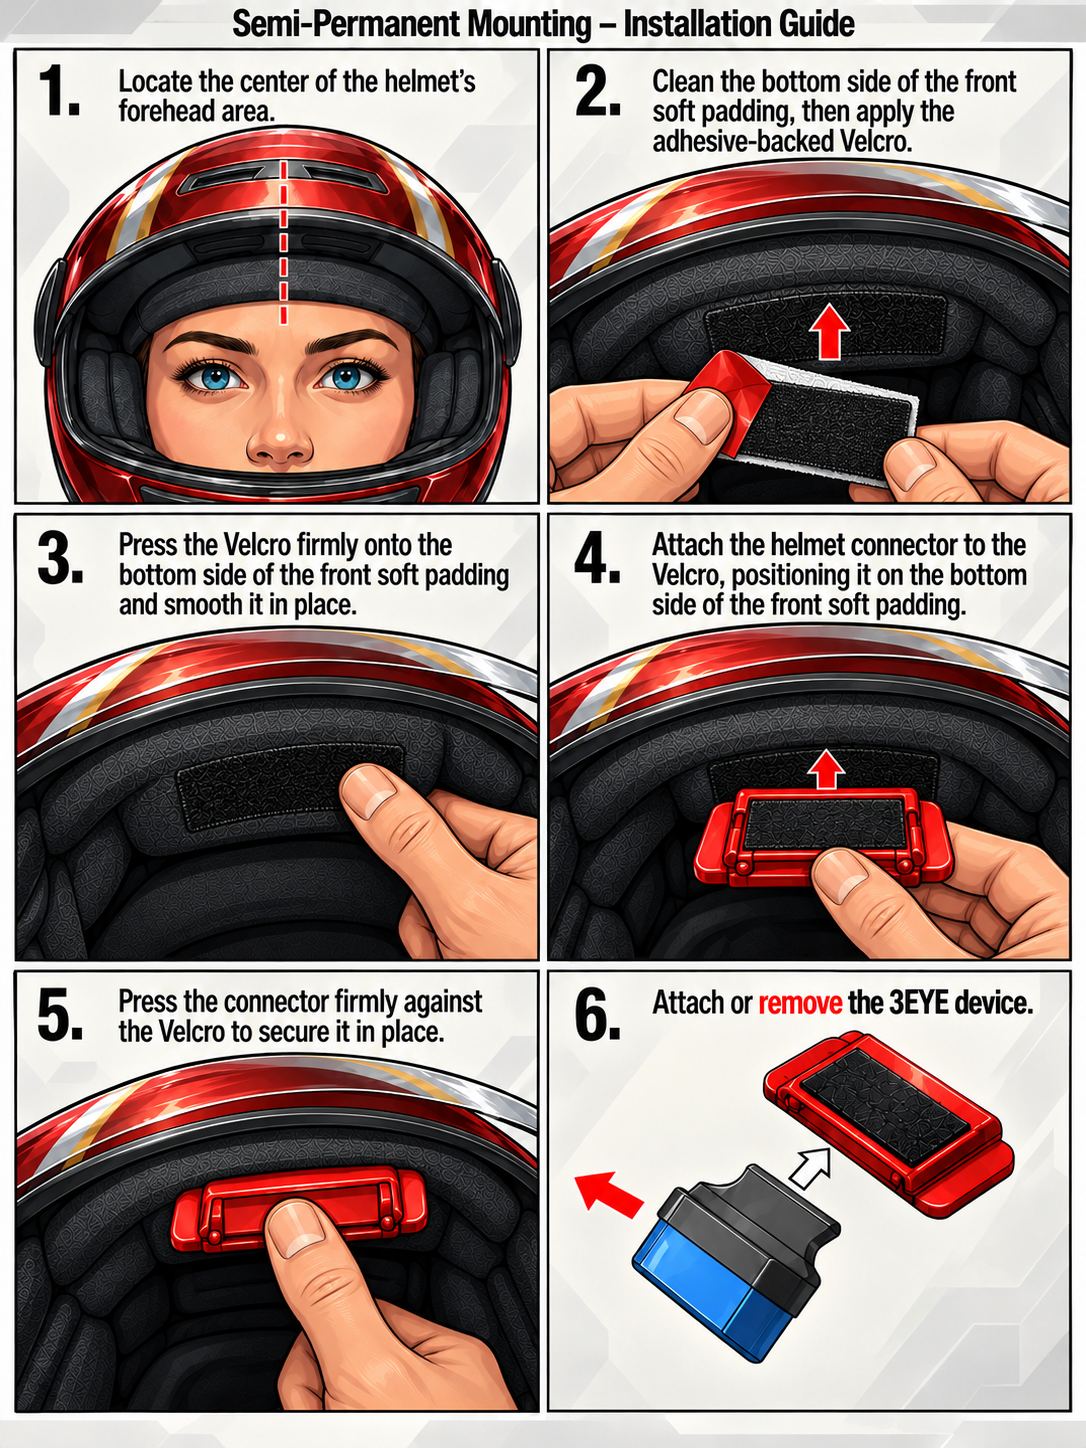
Figure 3. Semi-Permanent Mounting
See image 6 in Figure 3.
See image 6 in Figure 3.
The helmet connector remains installed, allowing quick attachment and removal of the 3EYE device.
If the helmet visor is too close to your forehead, install the thicker adapter spacer to move the 3EYE device slightly backward, away from the visor.
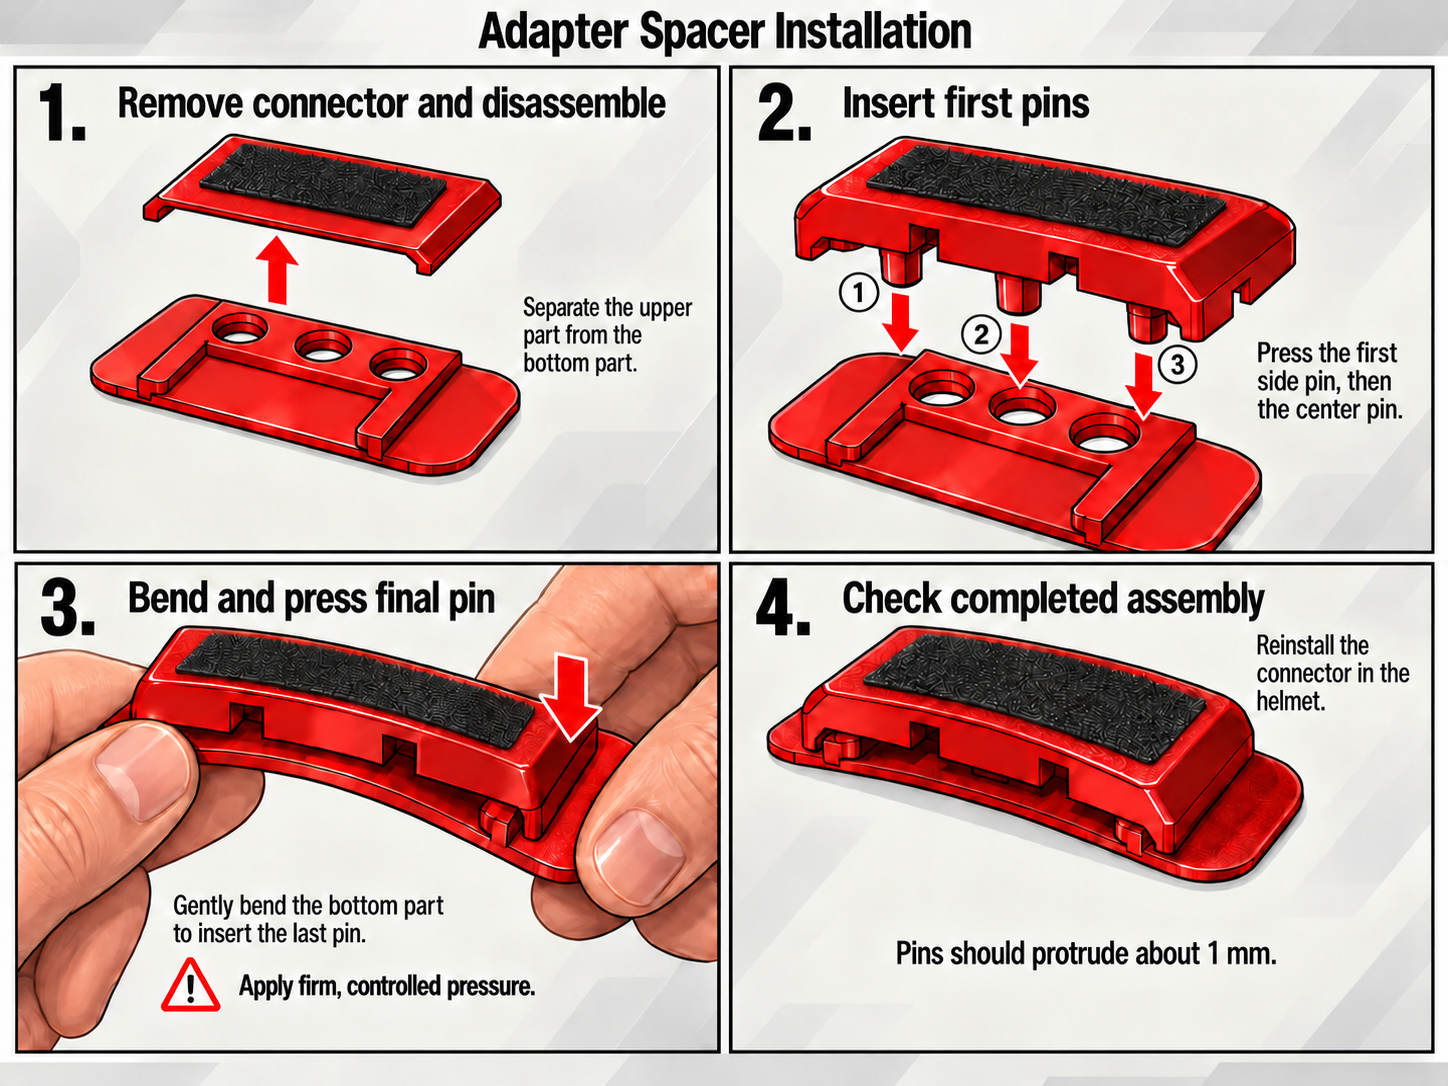
Figure 4. Adapter Spacer Installation
Follow the steps shown in Figure 4:
Remove and disassemble the connector.
Insert the first two pins.
Bend and insert the final pin.
Important: The pins are intentionally slightly larger than the holes for a secure interference fit. Their positions are also slightly offset, so some bending is required during assembly.
Check the completed assembly.
⚠️WARNING A 3EYE is a supplementary visual instrument and must not replace your primary altimeter.
Homepage: https://3eye.blue